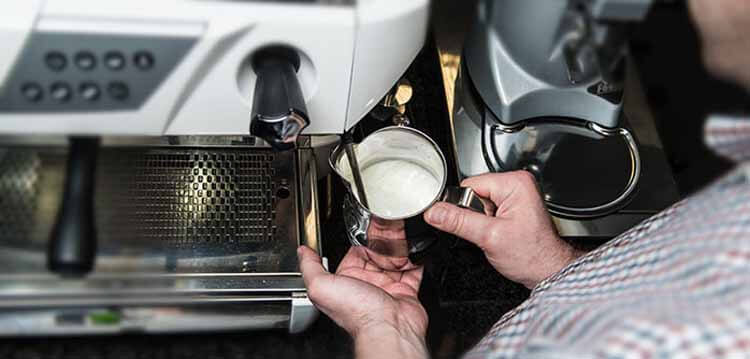
How important do you think foaming is for the coffee, which we all call frothing by the way? Okay! Just ask any coffee expert, and they’ll give you an answer on that. What they’ll say is if anything can control the perfection of your coffee the most is how right you’re doing the foaming.
Initially, it might look like a tough nut to crack. But once you learn how to make foam milk with an espresso machine, you won’t only find it easy but also a fun task to do as well. Now the question is how to pull that off. Well, we’re here for you to help with that. Just stick till the end to walk out of here as an expert.

Things You’ll Need to Make Foam Milk
You might be wishing that if you could do the foaming all by your hands. Well, as it’s not possible yet you better go with the traditional way. But for that, you’re going to do some things right on your countertop.
Don’t worry; the list isn’t a long one, and the names we’re about to take are probably you’ve got in your kitchen already. They are –
- Espresso Machine (Here is the list)
- Milk
- Milk pitcher
How to Make Foam Milk With Espresso Machine?
One of the best things about espresso machines is it can help you out with not only regular foaming but also a ton of other milk drinks too. After all, foam milk is something you can possibly use in some other drink recipes too.
Well, let’s not drag it anymore and have a glance at the steps that you’ll need to follow to make foam milk.
Step 1: Take some cold milk in the pitcher. But make sure the milk pitcher itself is cold as well.
Step 2: Now, grab the steam wand of your machine and submerge its tip in the milk. But purge it properly at first. There can be milk or water buildup in the tip, and let them go in your milk is not what we call a good idea. Don’t put the tip too deep but keep it right below the milk’s surface.
Step 3: Turn the steam wand on and keep the tip straight up. After a little while, angle the pitcher a bit so that it creates a whirlpool in there. When you start it first, you need to let some of the air get in. But don’t do it for more than a few seconds as you don’t want to scorch the milk.
Step 4: After you let the air get in, take the tip deeper in order to continue with the whirlpool. It’s important as that’s what will make the milk reach the right temperature.
Step 5: Once you’re done with the steaming, take the pitcher to give it a few knocks on the countertop to get rid of the bubbles in there. After that, it needs a bit of swirling to incorporate the foam. If things have gone right, you’ll see it nice and glossy.
But if it has gone wrong, all you’ll be seeing is spidery bubbles all over. It happens only when too much air gets in or what has gone in wasn’t sufficient.
Best Type of Milk to Foam
It mostly depends on the type of milk you’re using for frothing and how good foaming you’re going to get. But if you really want the best outcome here, then you better go for the whole milk.
With the ability to create thicker and creamier foam, you can make the finest cappuccino with it easily. On the other hand, low-fat milk keeps the foam quantity high, but you’re going to get larger air bubbles there too.
Still, if you’re looking for a non-dairy alternative, we think you can go for almond milk or soy milk. Though you can use it in a frother, you better be ready for some thin results there too.
Extra Tips
Knowing the right tips often cuts the hassle in half. And when it’s about cooking or any other recipes, they can turn into a great time saver. So, are you ready to grab some for yourself? Let’s catch up then.
- It’s nothing impossible to see large bubbles on the frothed milk. Rather than declaring it a failed project, just try tapping it on your countertop. But do it firmly. Then try lightly swirling the milk and check the bubbles again. You probably won’t see any bubbles there after that.
- Killing time is what will kill your milk too. Try pouring the milk quickly after the frothing. Because as the texture starts breaking down with the unnecessary delay, you might not get the result you want to see on your coffee.
- Leave some of the milk in your pitcher in order to ensure that what you’ve poured was nothing but foam. There’s a high chance what you’ll leave behind will be nothing but some untextured milk.
- Never forget to clean the steam wand up after using it. After all, the last thing you’d like to have in your milk next time is bacteria, right? To do the cleaning more accurately, try running the steam on some water in the same way you froth the milk. To ensure cleanliness, repeat the process twice.
Final Words
Will it actually be possible to rush to a coffee shop all the time to get that cup of coffee, especially when you’re on the edge of another lockdown? The answer is no, we guess. In such situations, it’s better to take things into your own hand and get a cup for yourself.
Related Recourse: WAYS TO FROTH AND TO STEAM – The Coffee Brewers
